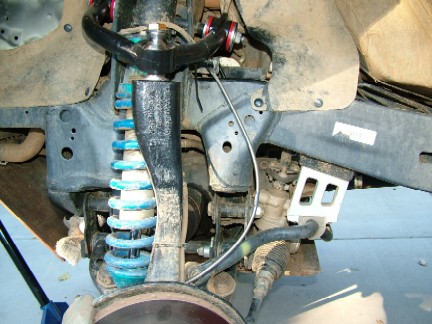
I
had some problems
with the brake lines being too close to the bottoms of the coilovers.
I had actually broken 2 brake lines by having them hit the
bottom mounts of the coilovers in extreme conditions.
Both
the Pro-Comp aftermarket brake lines that I was running and the factory
lines are made to have the line exit the caliper and exit going straight
up. While this is fine with the factory struts, with some
coilover setups this can cause problems. We have already
confirmed that it happens with the King and Donahoe coilovers. We
are not sure about other brands.
My
idea was to have some custom lines made and have the line exit the caliper
and go straight back towards the rear of the truck. I wanted
them to be 1 inch longer, have different ends and also still be DOT
approved. This is what I came up with!
You
can order your own set of these lines. Click HERE
to find out more!
|
|
|
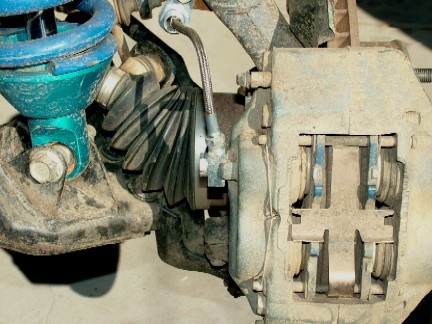
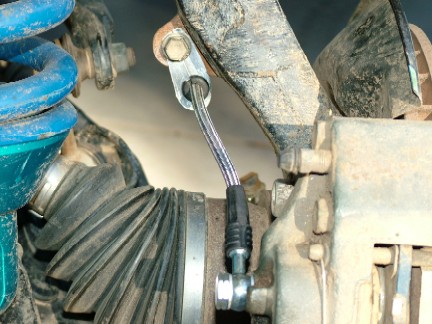
The first few pictures
are of the Pro-Comp lines and how they were routed.
Because of the large
block banjo fitting and the small tab on the caliper the line has to
exit going straight up.
|
|
|
After
going straight up, it has to turn and head back towards the rear of the
truck to attach to the spindle.
|
|
|
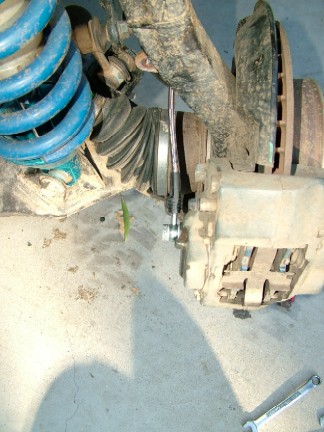
Here is a side shot
of the old setup.
To remove the old
line, just remove the banjo bolt (green arrow), the 12mm bolt where
it attaches to the spindle and then the fitting at the top of the line.
|
|
|
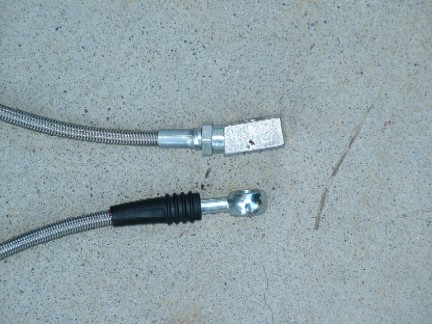
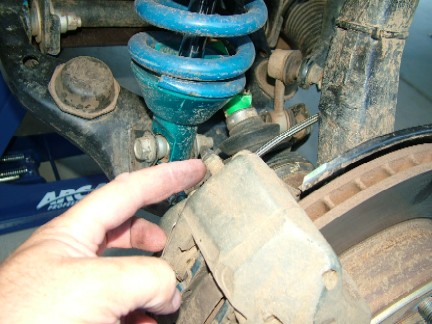
The
ends on the new lines are smaller, round, and straight. Note
how the Pro-Comp line (top) has a slight angle on the line where it meets
the banjo fitting. Because of the smaller round end, the new
line can exit the caliper going almost any direction you want it to go.
|
|
|
The
top fitting attaches to the stock mount just like a factory line.
|
|
|
Here
you can see a shot from above looking down on the new line attached to
the caliper.
|
|
|
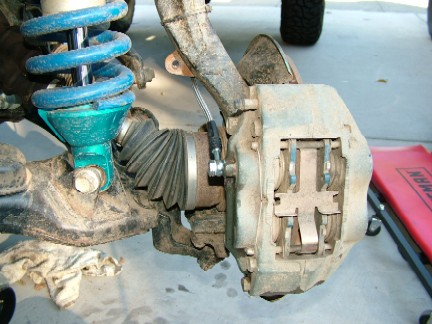
Another
shot of the new line leaving the caliper heading towards the rear of the
truck instead of making the bend.
|
|
|
I
had the new lines made 1 inch longer than the Pro-Comp lines. According
to Pro-Comp, their lines are supposed to be good for up to 6 inches of
lift. I don't think I would use them with 6 inches myself
as they looked like it would be tight. Now I will have plenty
of slack, but not enough so as to get in the way of things.
|
|
|
I
needed to make a tie off to attach the line to the spindle. I
used a small rubber grommet and some sheet metal and made one.
|
|
|
I
cut the grommet so I could get it onto the line.
|
|
|
I
then cut out and drilled a simple bracket. I cut the it down the
middle from the mounting screw hole to the hole where the line will go
through (not all the way through). This way you can get the
grommet and line through the bracket hole by opening the bracket up. The
12mm bolt and washer will hold it together so the cut should not affect
it.
|
|
|
Once
the grommet and bracket are on the line, I bolted it to the spindle. This
is a much more natural route for the line.
|
|
|
The
final step was to bleed the brakes. Here you can see the bleeder
screw on the caliper (green arrow).
|
|
|
I
have now removed the rubber dust cap that covers the bleeder screw (green
arrow).
|
|
|
Since
I was by myself, I used a vacuum bleeder to draw fluid through the new
lines and bleed the brakes.
|
|
Here
you can see a before and after pictures. They are from slightly
different angles, but both on the same side. You can see a
big difference in how close the line is to the bottom of the coilover.
Once I have run the lines for a while, I will update the page.
|
|
AFTER
|
BEFORE
|
|
|
|
|
|
|
| Back
to the Tacoma Page |
| Back
to the Home Page |

|
|
9-4-2004
|